Integrating Mango with Twilio Studio IVR: A Complete Guide
Overview
This guide explains how to integrate Mango's customer support capabilities with Twilio Studio's Interactive Voice Response (IVR) system. This integration allows you to create a professional phone system where customers can self-serve through automated menus while maintaining the option to connect with live support agents.
Prerequisites
- A Twilio account with Studio access
- A Mango account
- Your Mango Client ID (found in Mango Settings)
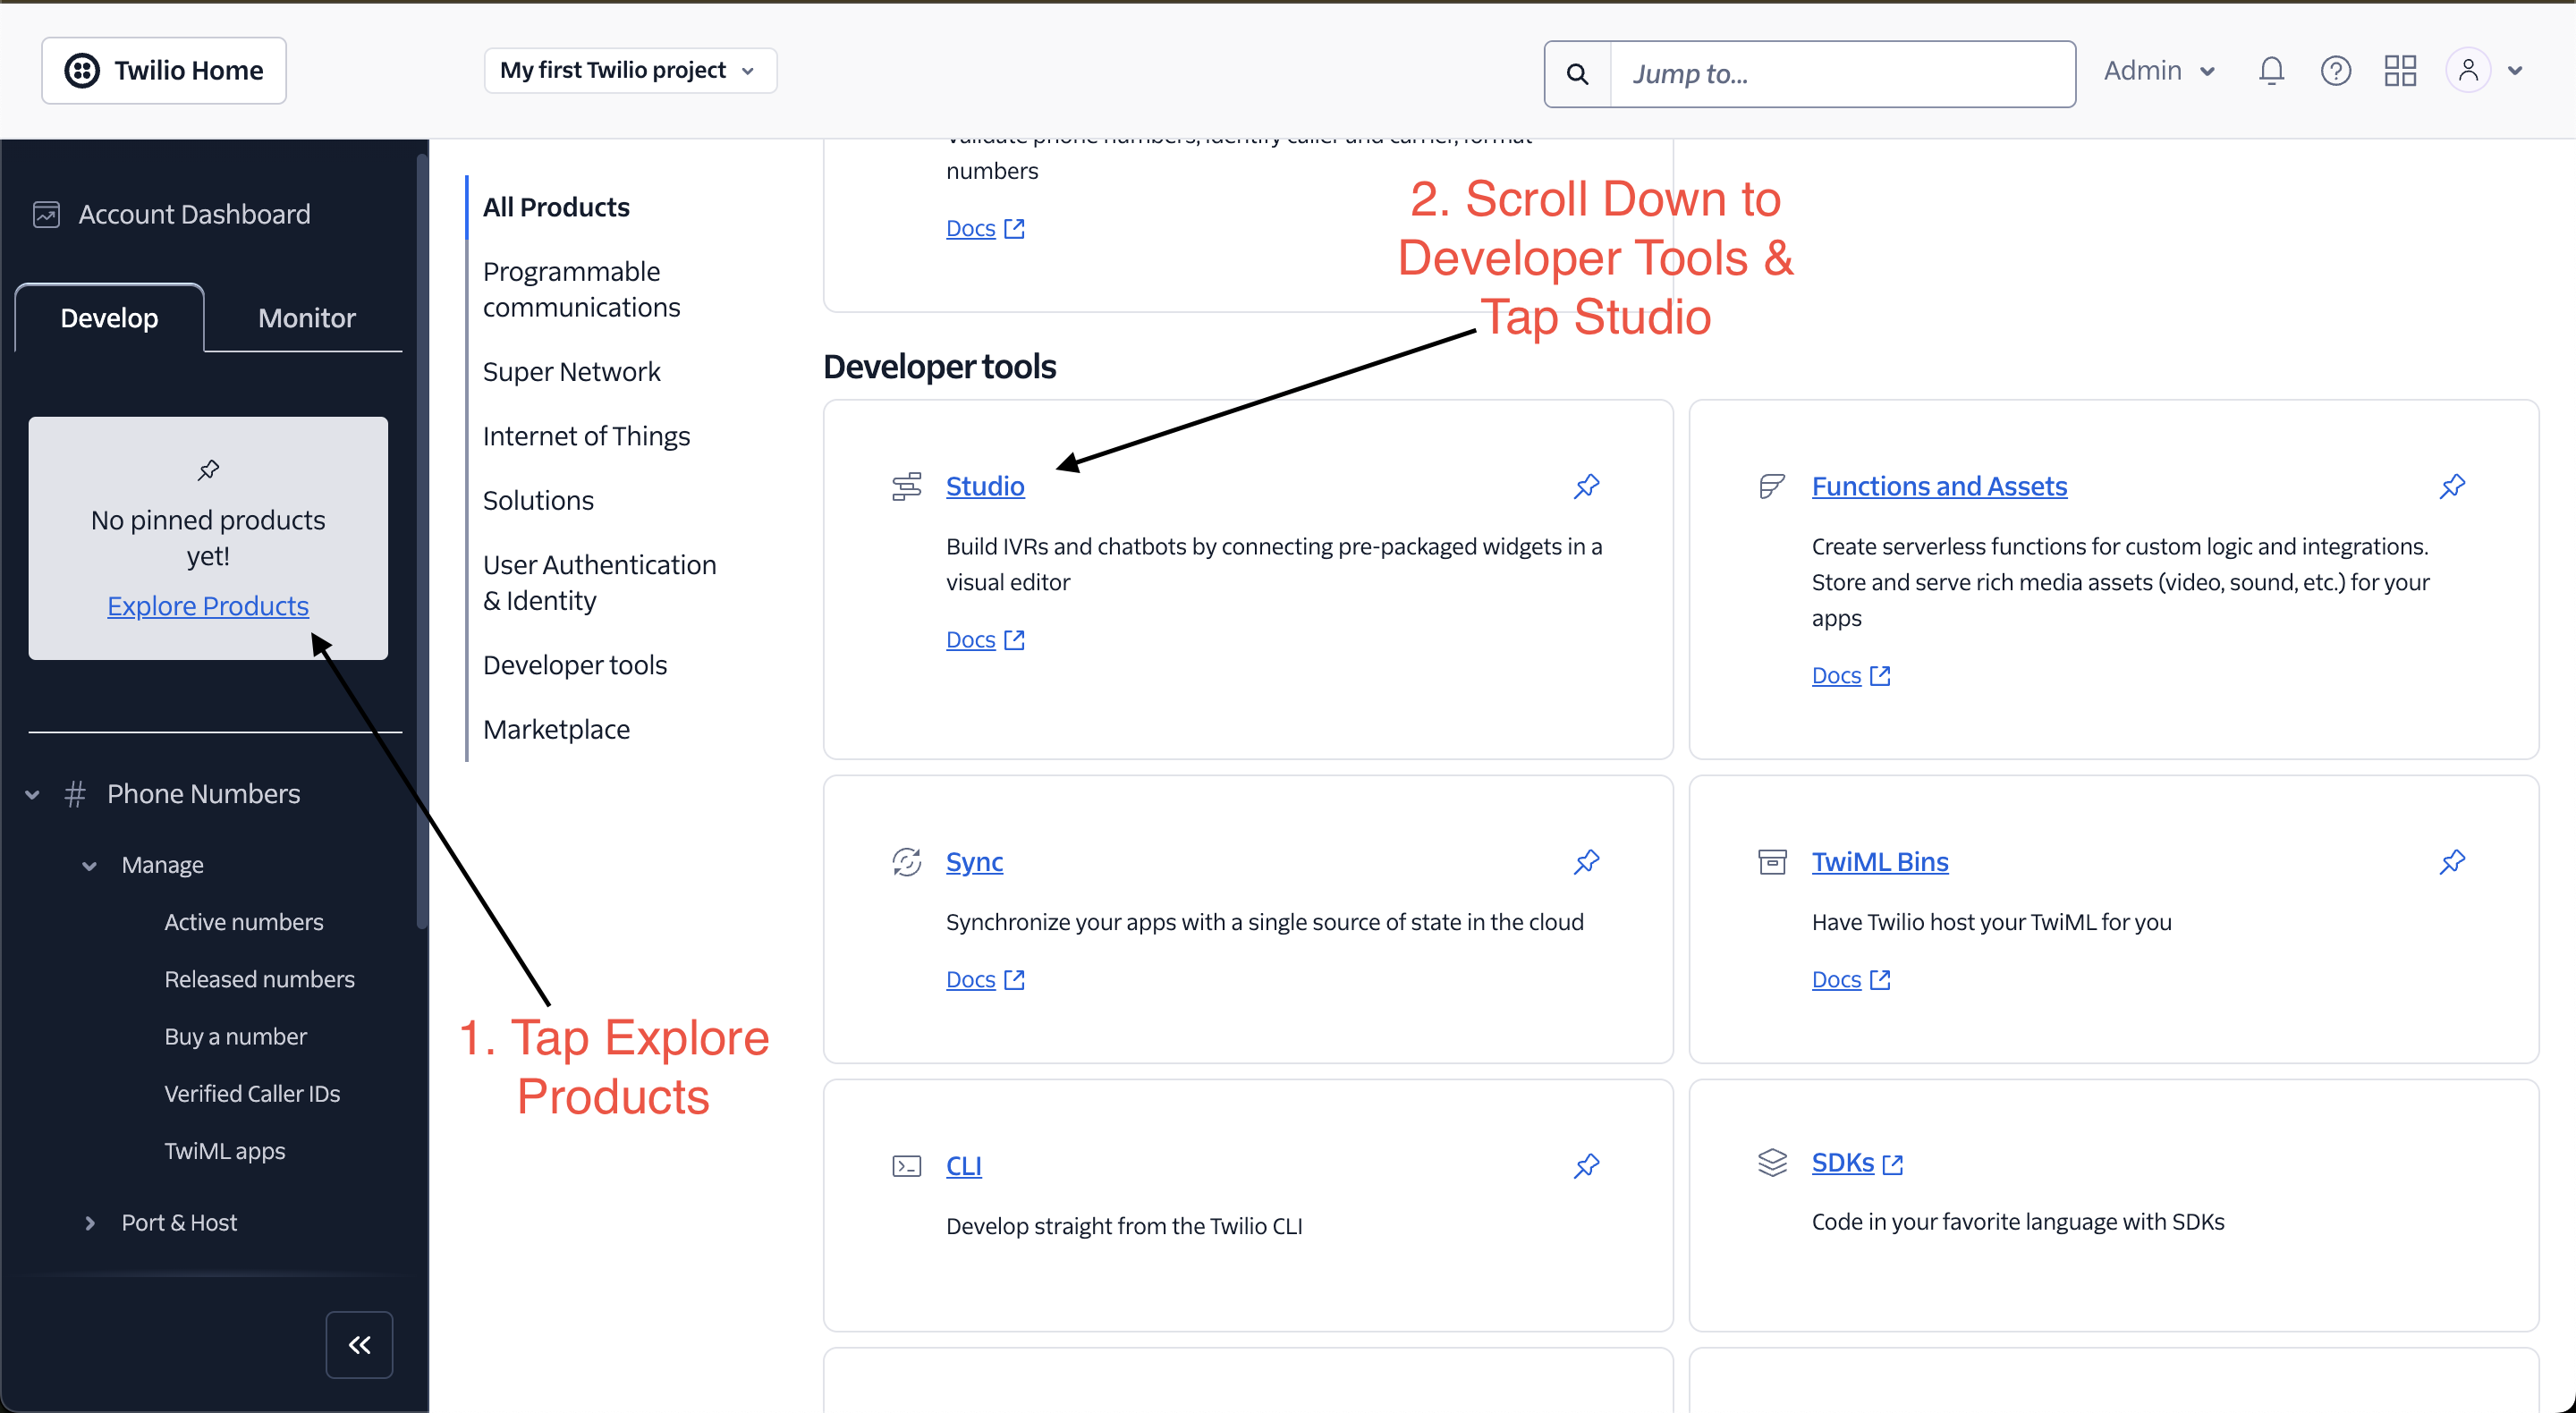
Basic Implementation Steps
1. Setting Up Twilio Studio Flow
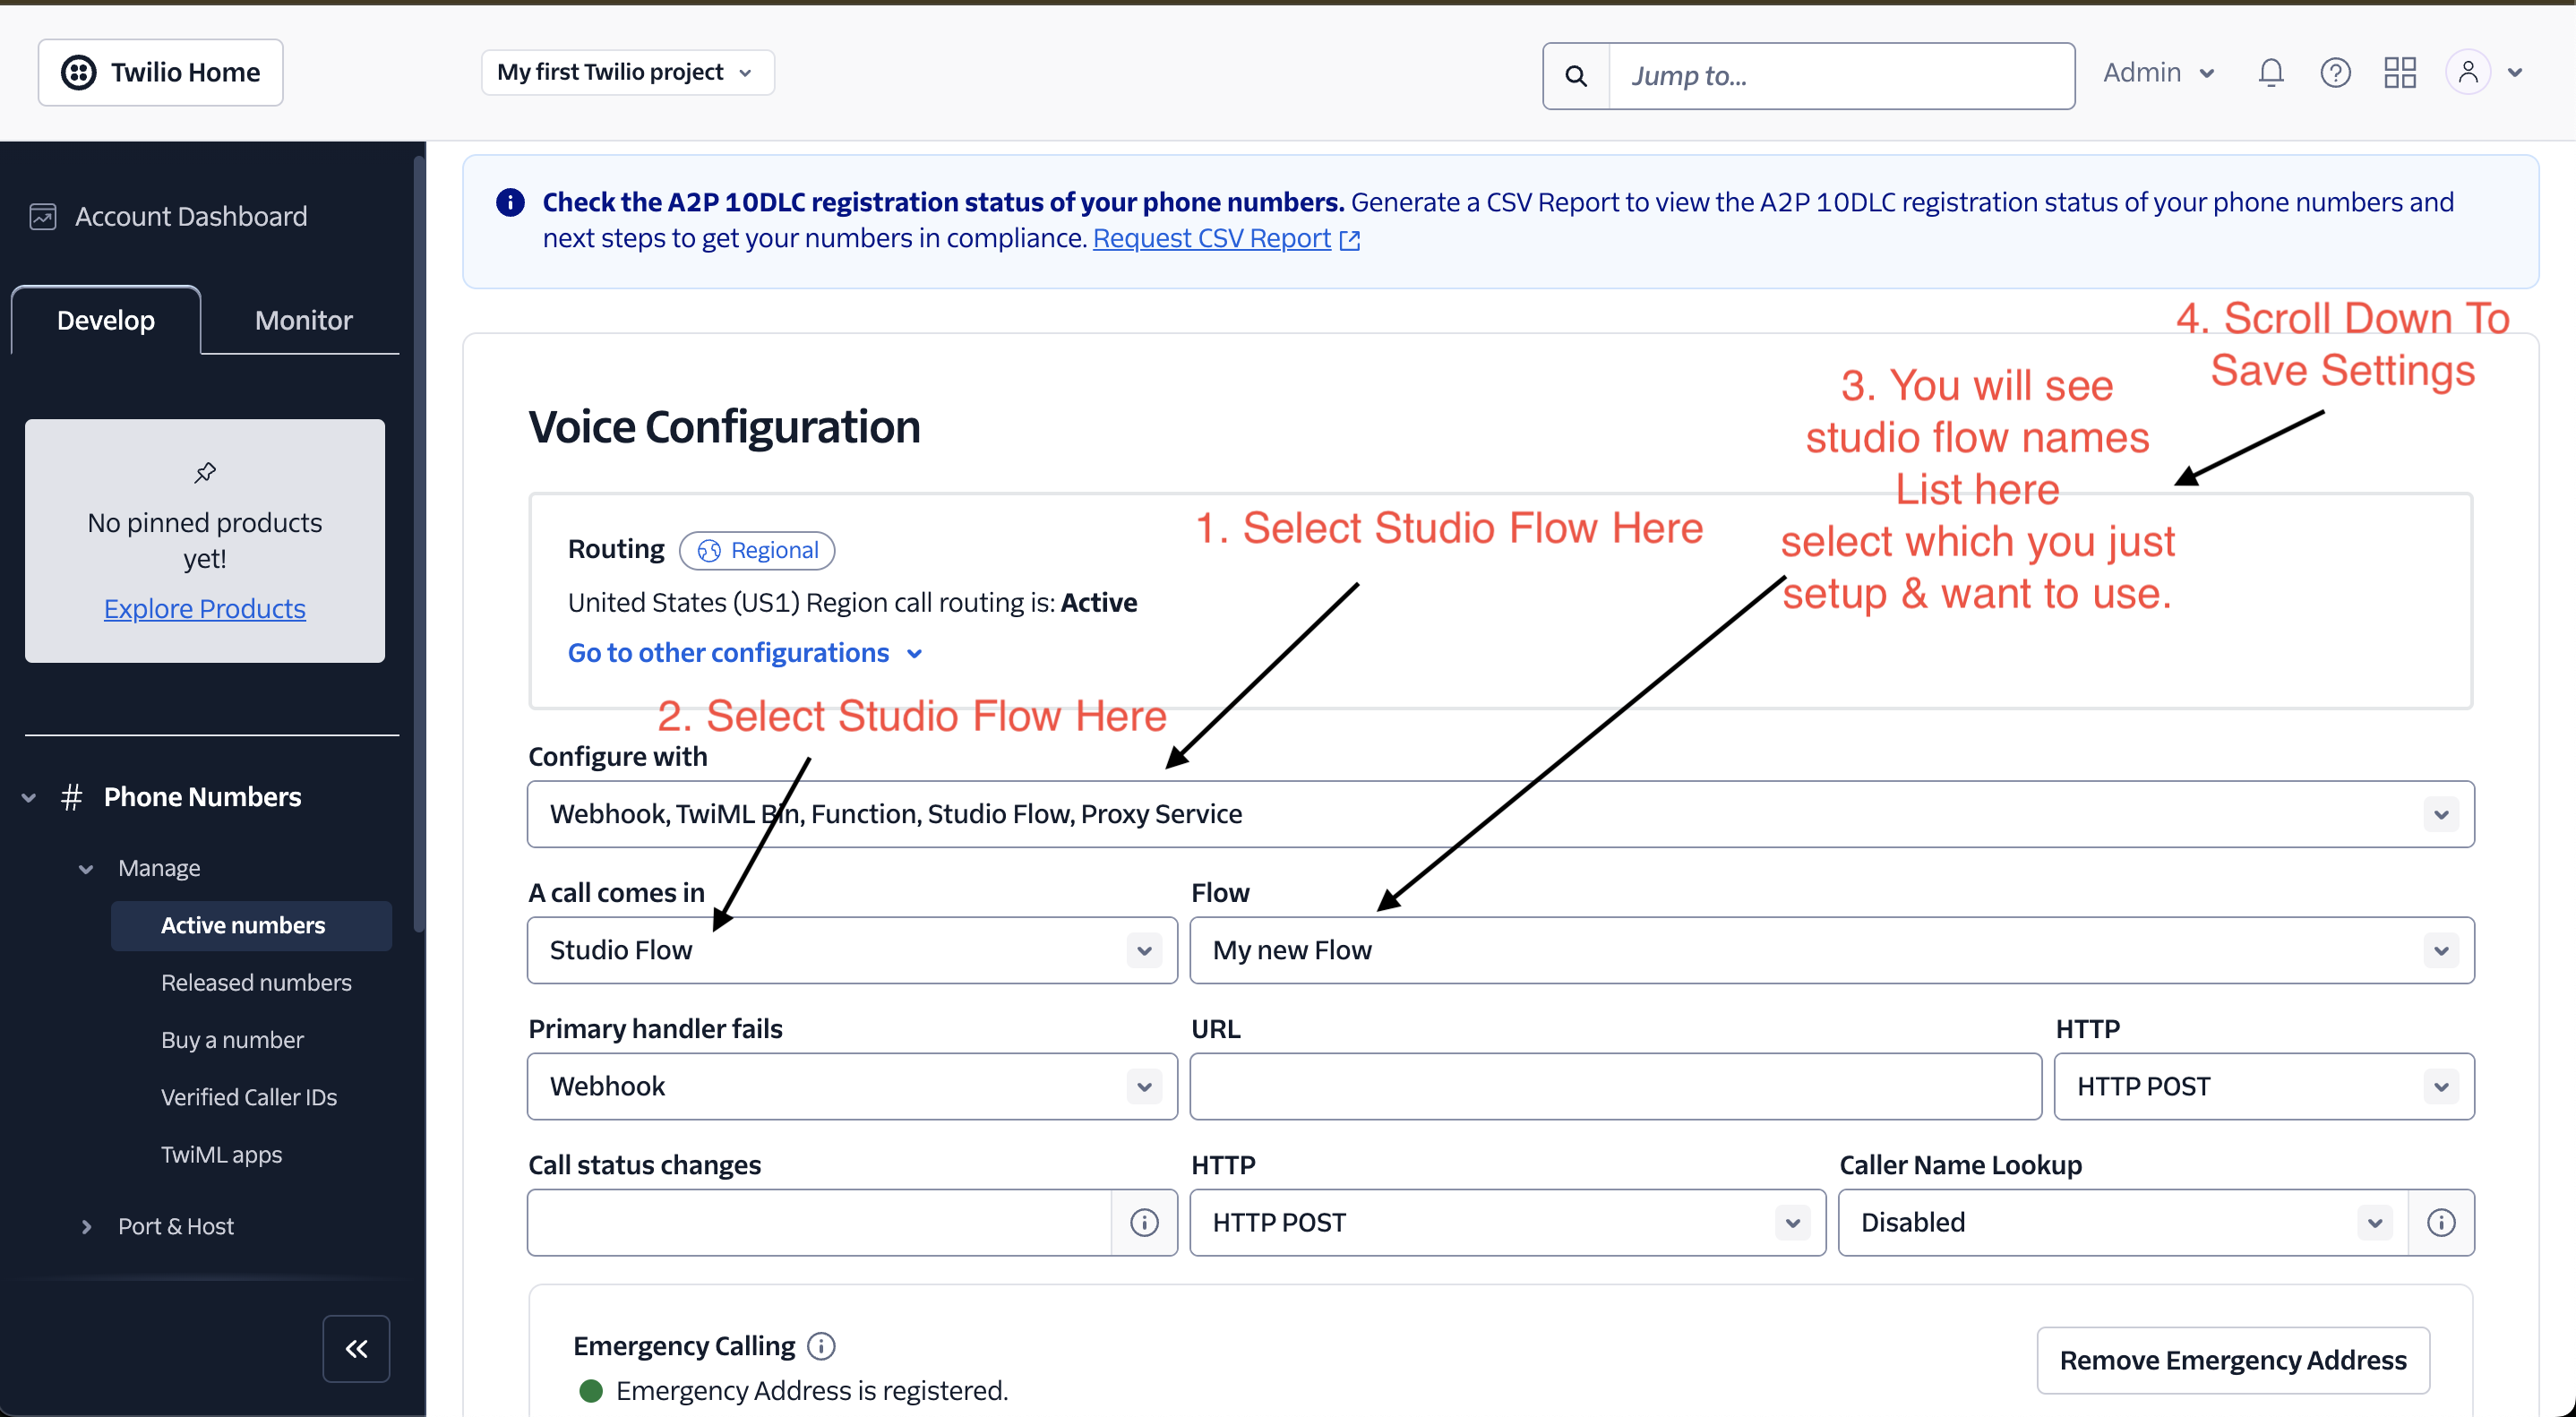
First, create a new Studio Flow in your Twilio account. This will serve as the foundation for your IVR system.
Configuring Your Twilio Phone Number
Go to Phone Numbers → Manage → Active numbers
Select the phone number you want to use for your IVR
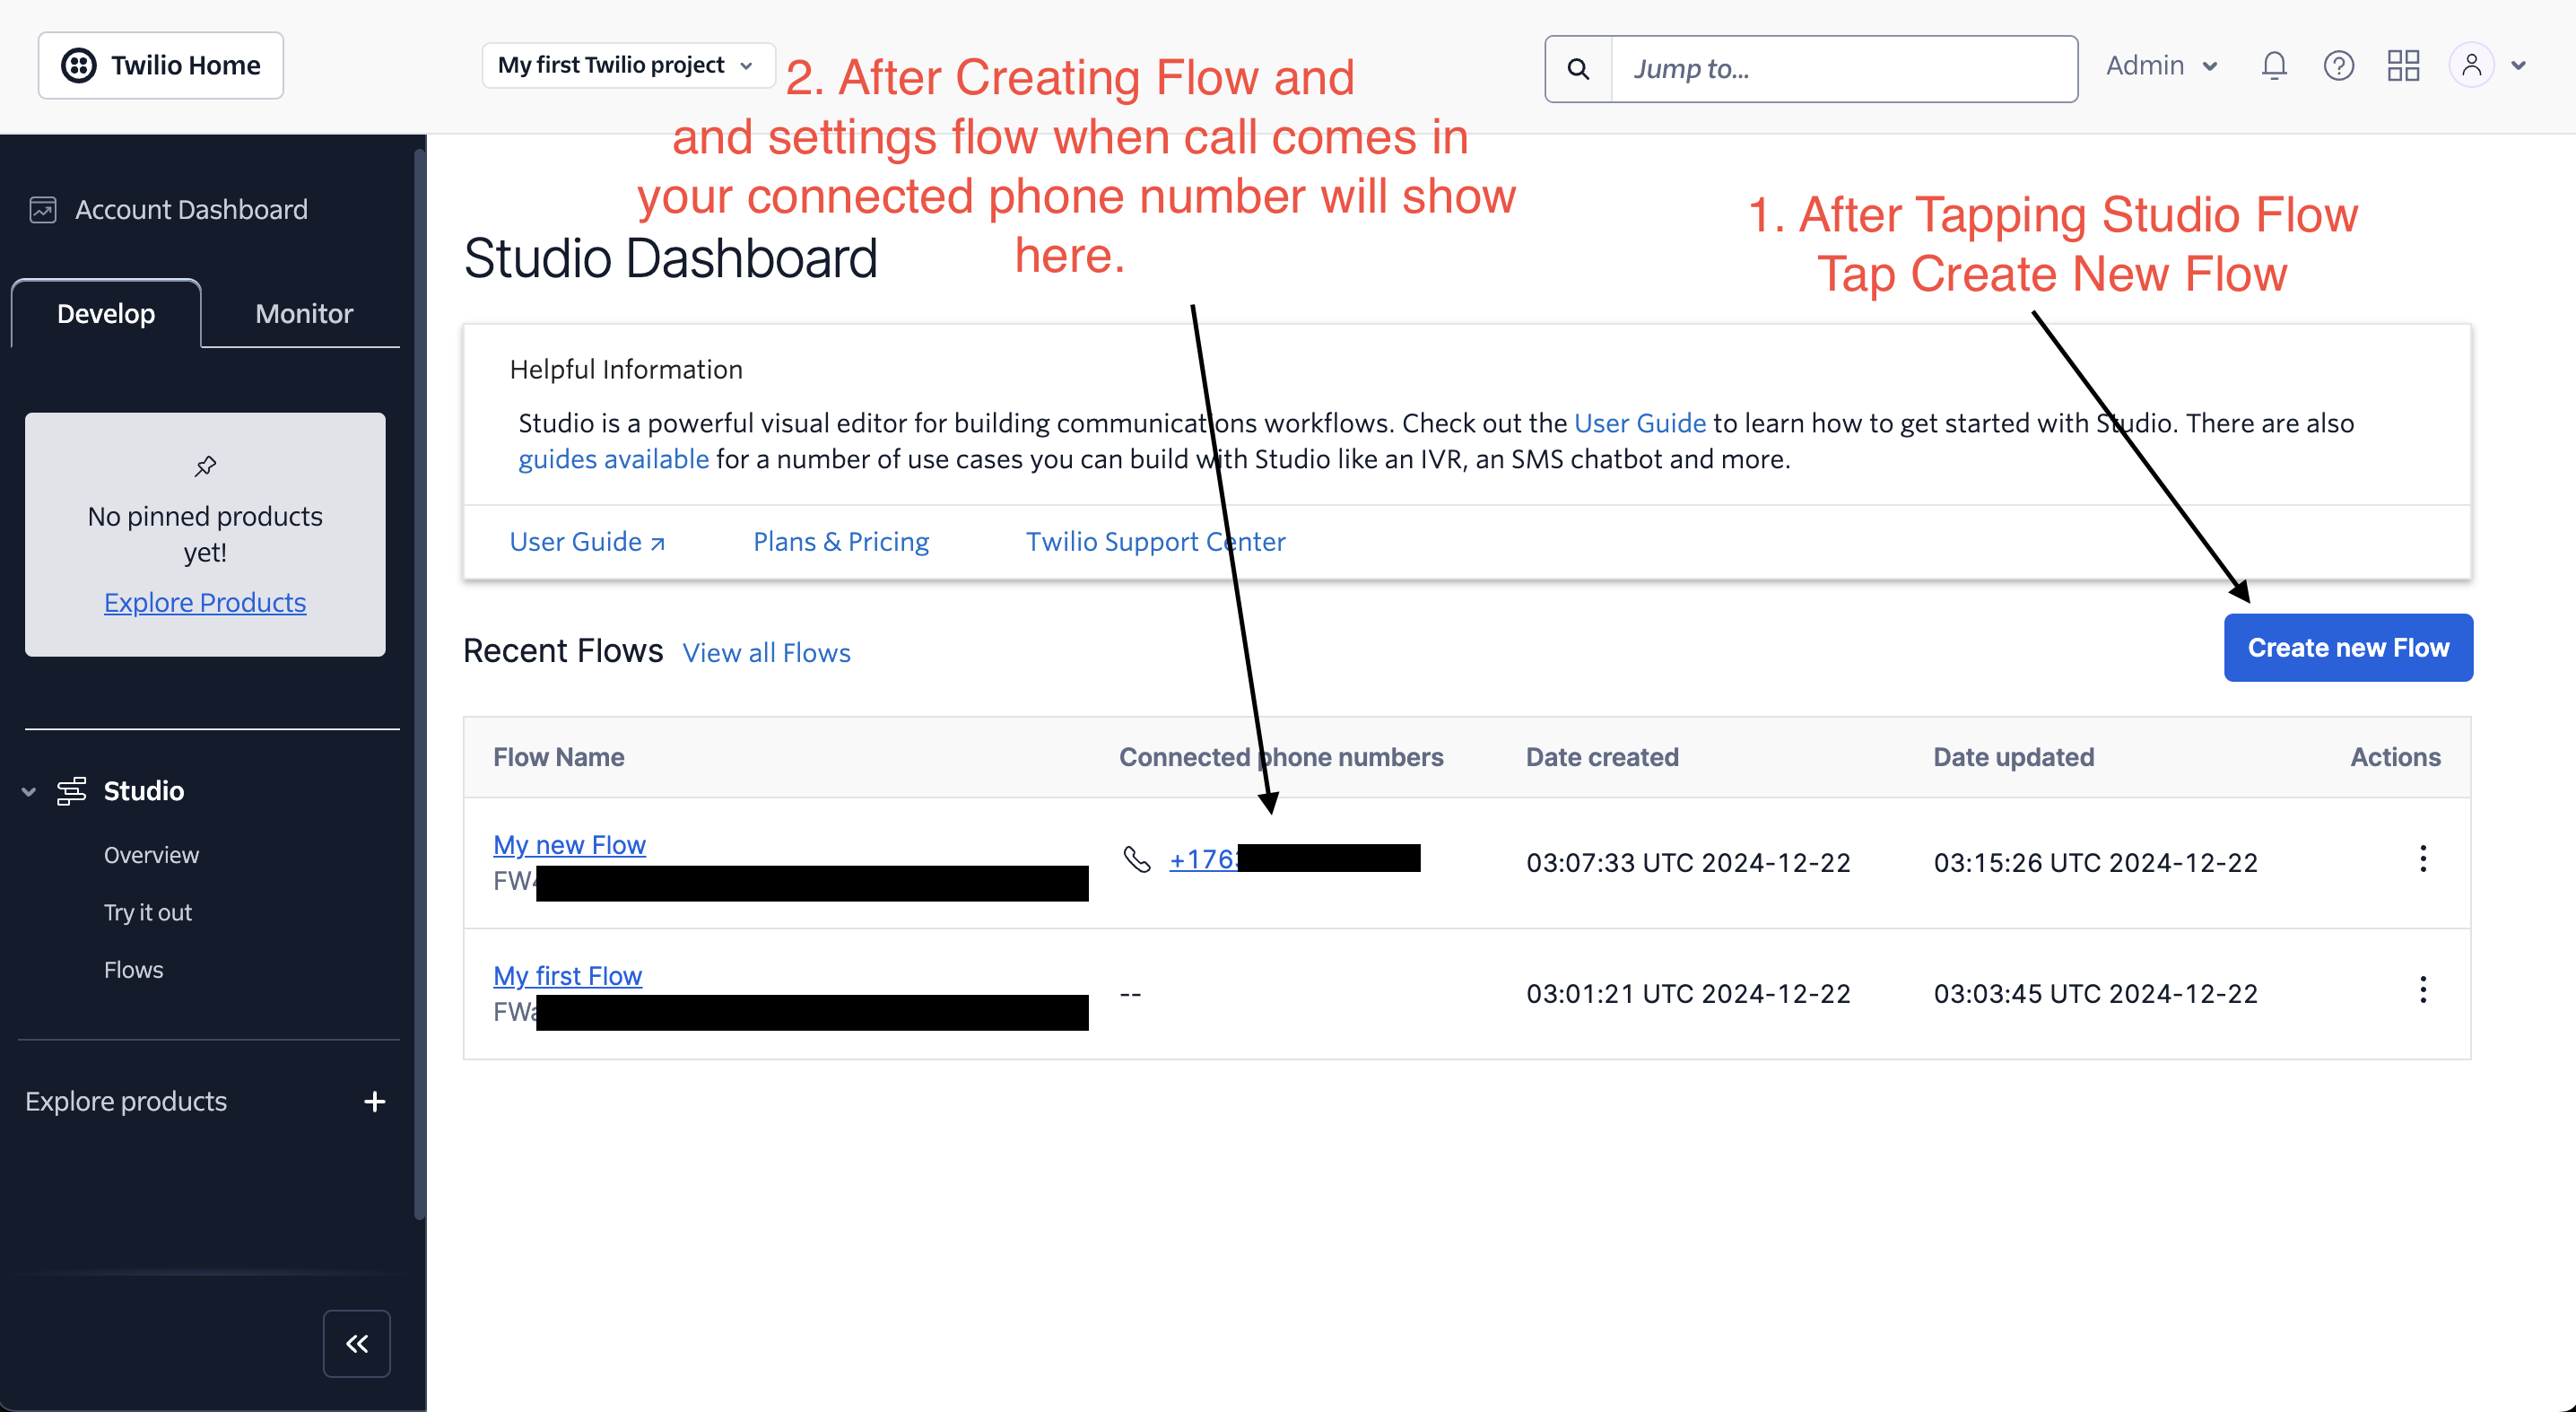
Scroll to "Voice Configuration" section
Under "A call comes in", select "Studio Flow"
From the dropdown, choose your newly created flow
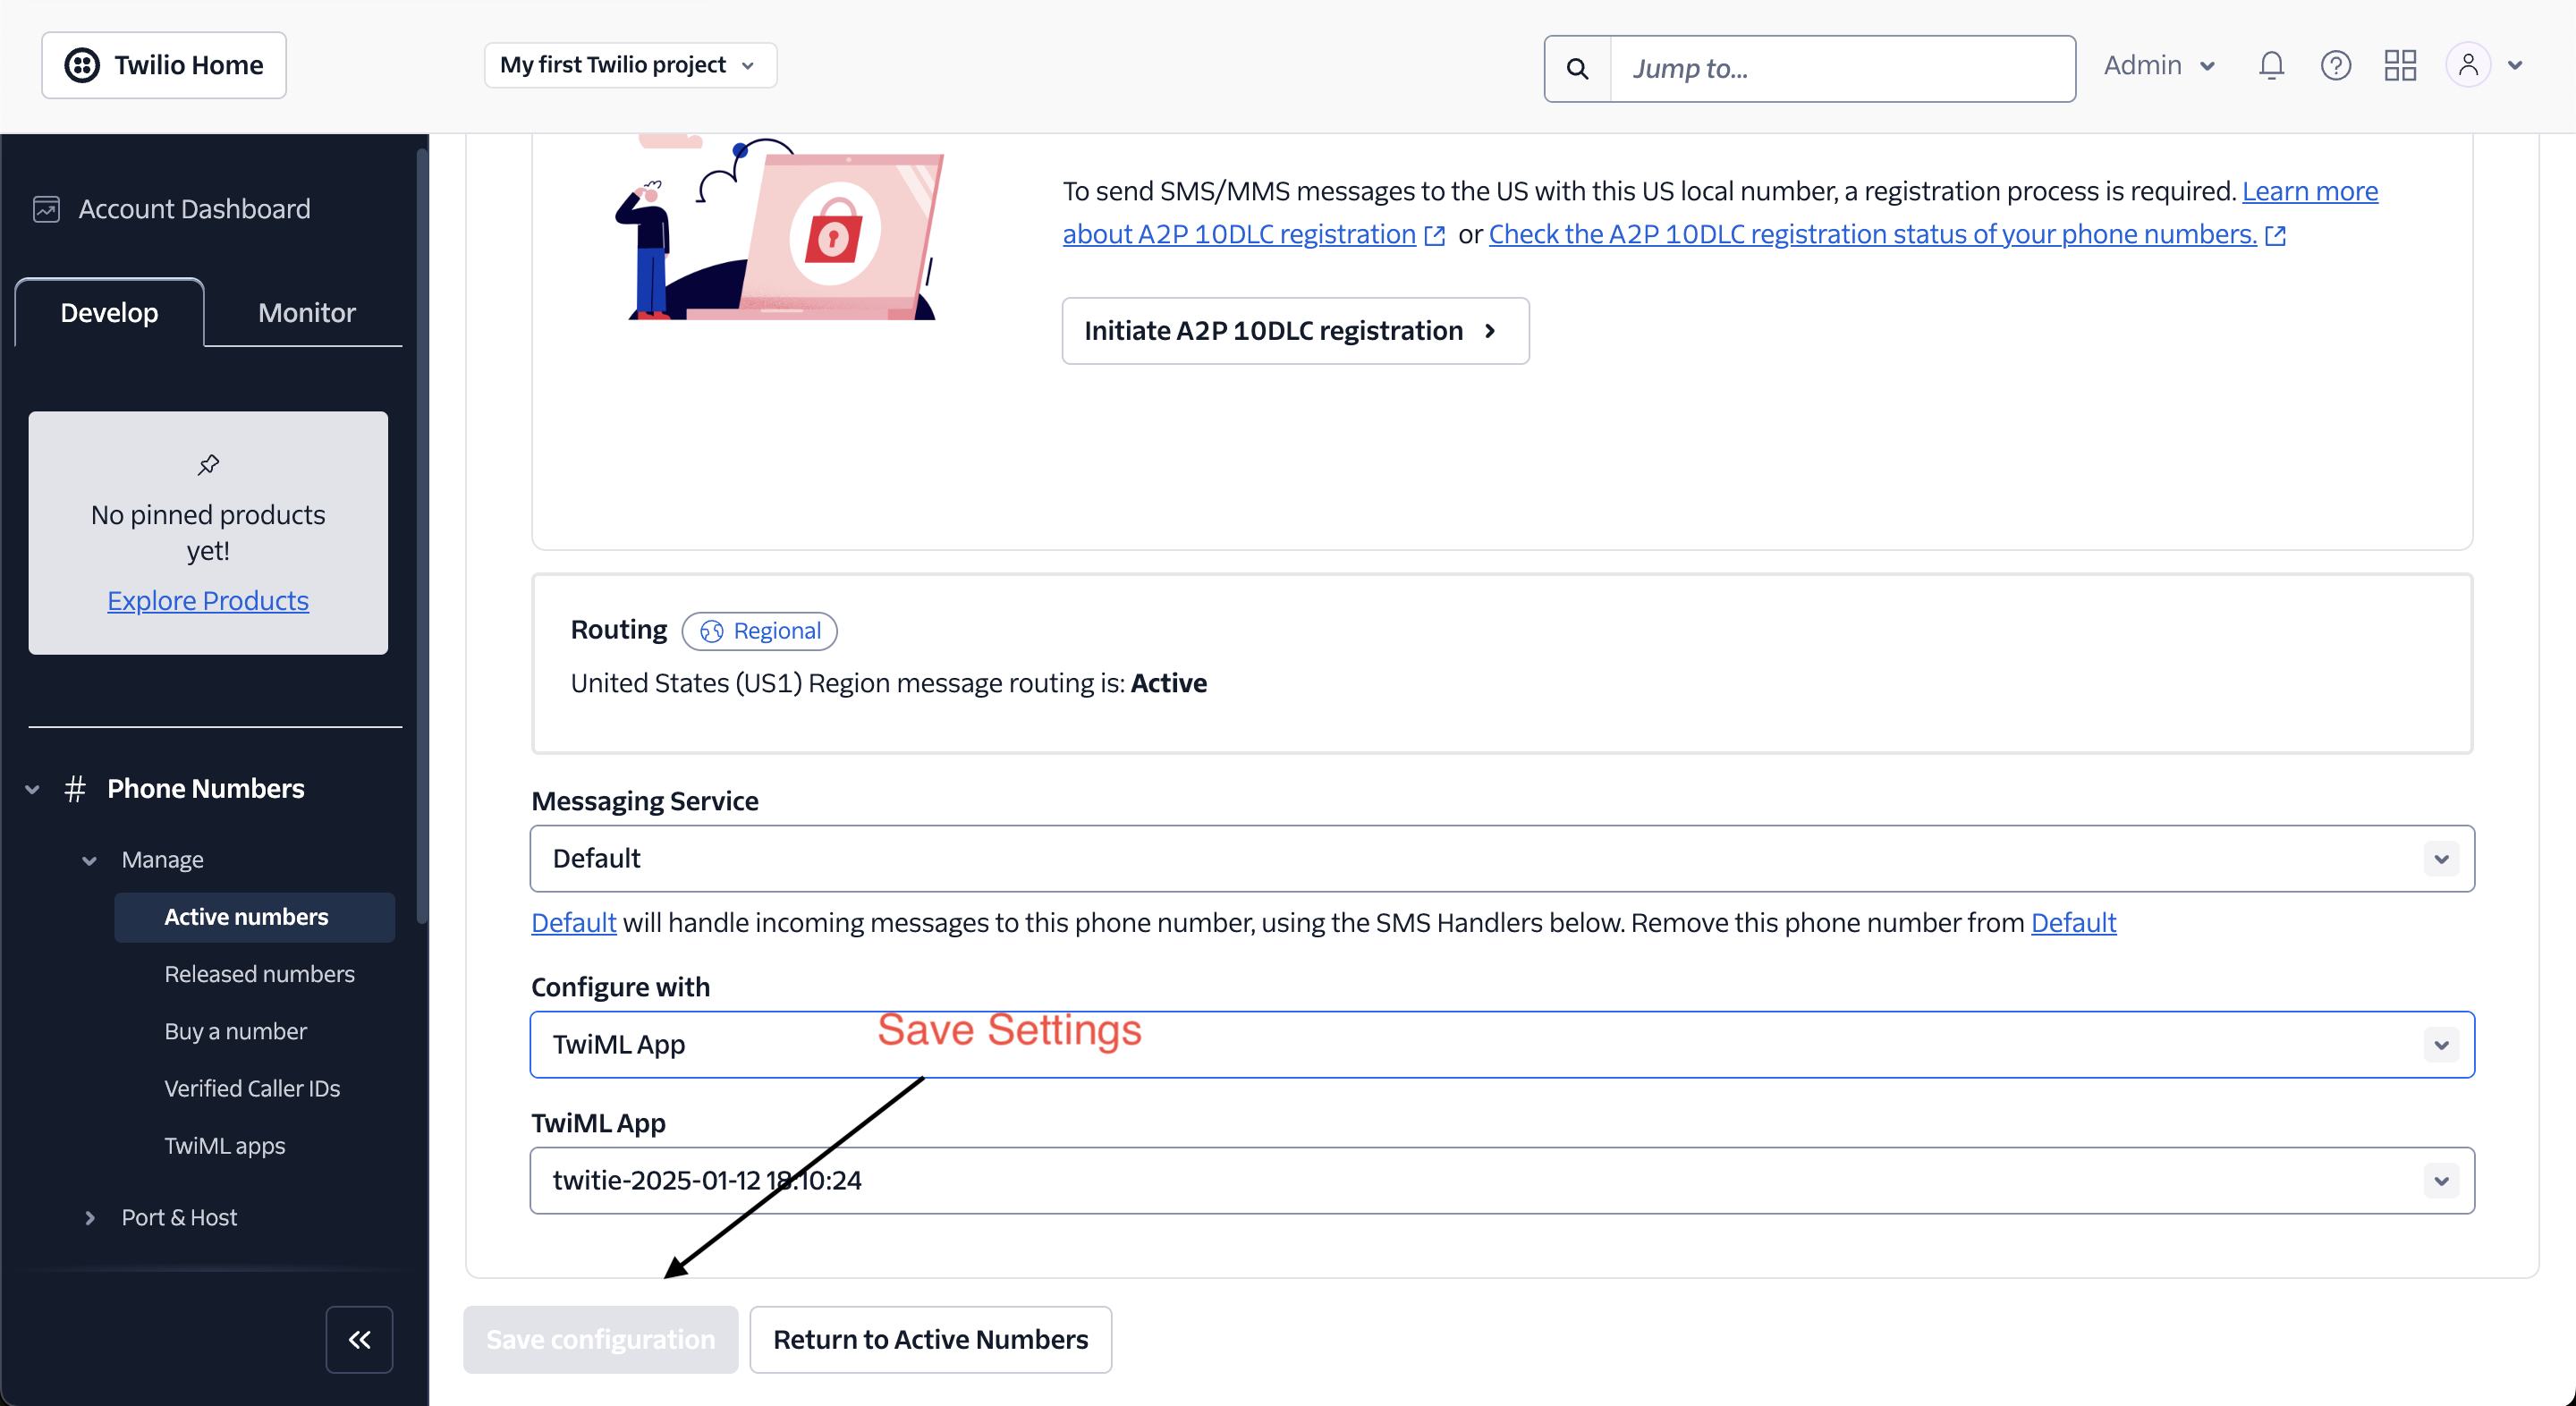
Click "Save" to apply the changes
Now all incoming calls to this number will be automatically routed to your Studio Flow. You'll see a "Trigger" widget in your flow - this is where calls begin their journey through your IVR system.
2. Configuring the IVR Menu
Create your main menu using Twilio's 'Gather Input' widget. This allows customers to make selections using their keypad. Common options might include:
- Press 1 for Business Hours
- Press 2 for Location Information
- Press 3 for Account Balance
- Press 0 for Customer Support
3. Mango Integration
To enable live support through Mango when a customer presses 0:
- Add a 'Connect Call' widget after your 'Gather Input' widget
- In the widget settings:
- Set the "Connect Call To" field to "Client User"
- Enter your Mango Client ID under the "Client User" field
- Enable call recording if desired
- Configure whisper messages or other additional settings
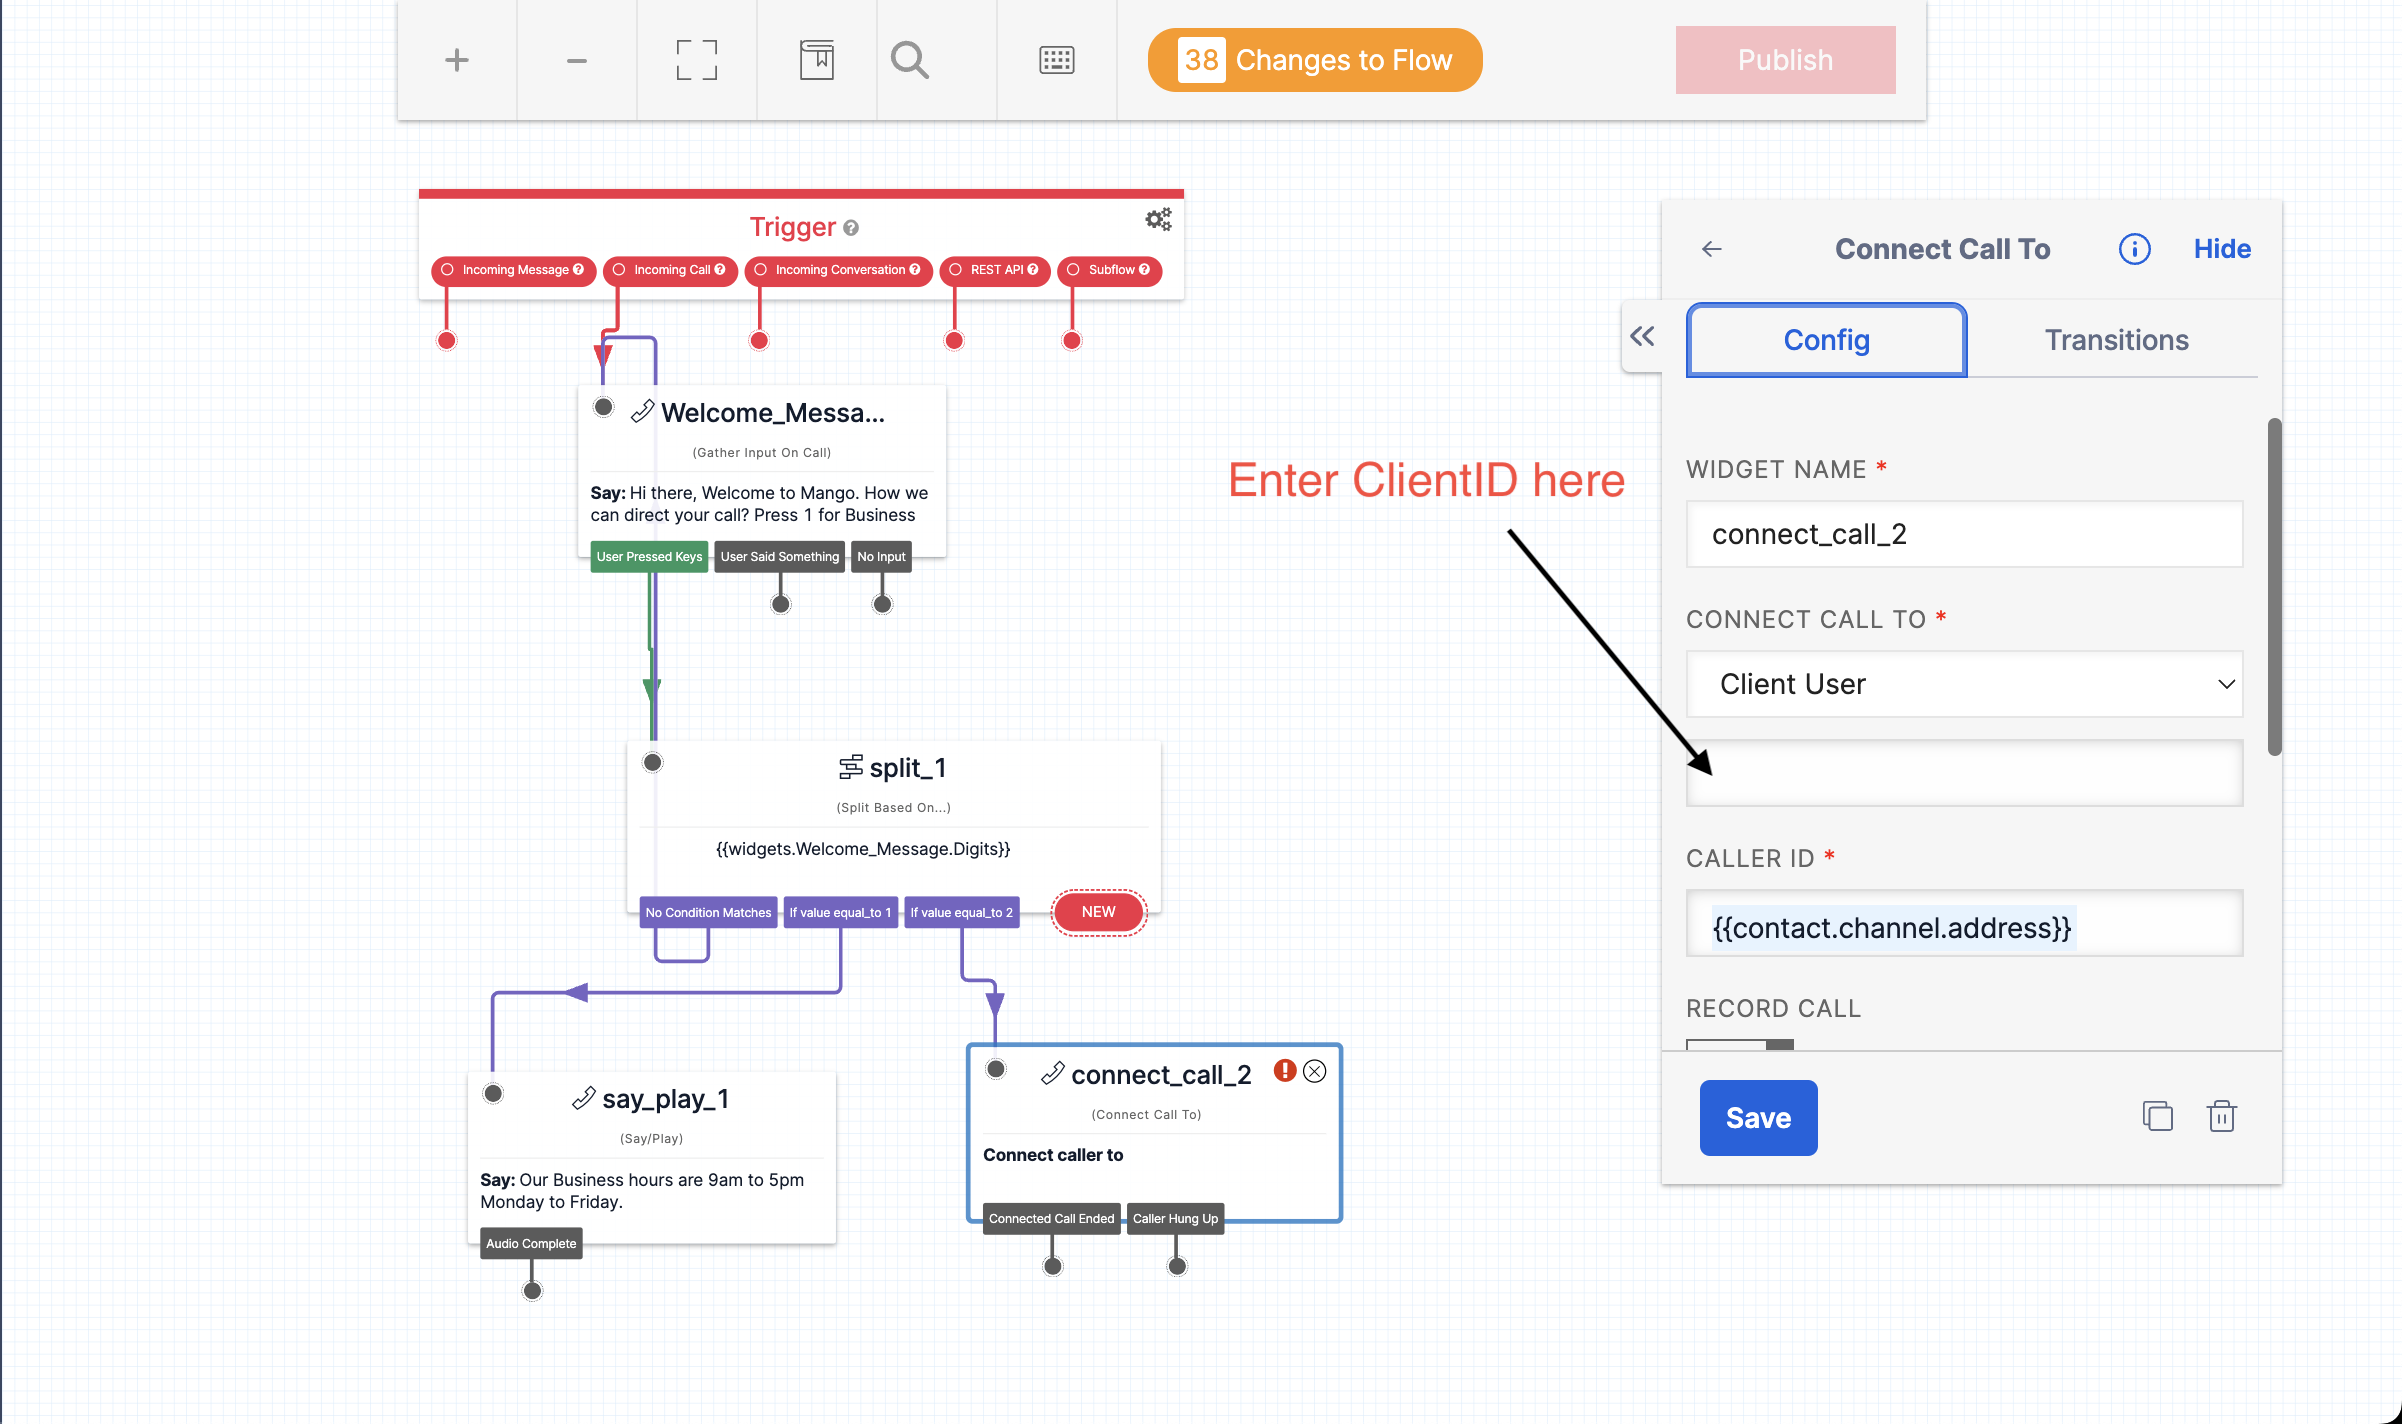
4. Call Flow Example
Customer Calls → Welcome Message → IVR Menu
                                     ↓
                   [Press 1-9] → Automated Responses
                                     ↓
                   [Press 0] → Forward to Mango Support
Best Practices
Call Routing
- Set up fallback options in case all agents are busy
- Configure business hours routing
- Implement queue management for high-volume periods
User Experience
- Keep menu options simple and concise
- Limit menu depth to prevent customer frustration
- Provide an option to repeat menu choices
- Always offer a way to reach a live agent
Technical Configuration
- Test the system thoroughly before deployment
- Monitor call quality and connection rates
- Set up proper error handling
- Configure webhooks for advanced integration
Troubleshooting
Common issues and solutions:
-
Calls not forwarding to Mango
- Verify Mango Client ID is correct
- Check Twilio Studio flow connections
- Ensure proper webhook configurations
-
Poor audio quality
- Check network connectivity
- Verify codec settings
- Monitor call metrics in Twilio Console
-
Disconnections during transfer
- Review timeout settings
- Check for proper error handling
- Verify webhook responses
Advanced Features
Queue Management
- Implement callback options for busy periods
- Set up estimated wait time announcements
- Configure priority queuing for VIP customers
Analytics
- Track key metrics like:
- Average handle time
- First call resolution rate
- Transfer rates
- Customer satisfaction scores
Conclusion
By following this guide, you can create a professional IVR system that seamlessly integrates Twilio Studio with Mango's support capabilities. Remember to regularly test and update your system based on customer feedback and usage patterns.